
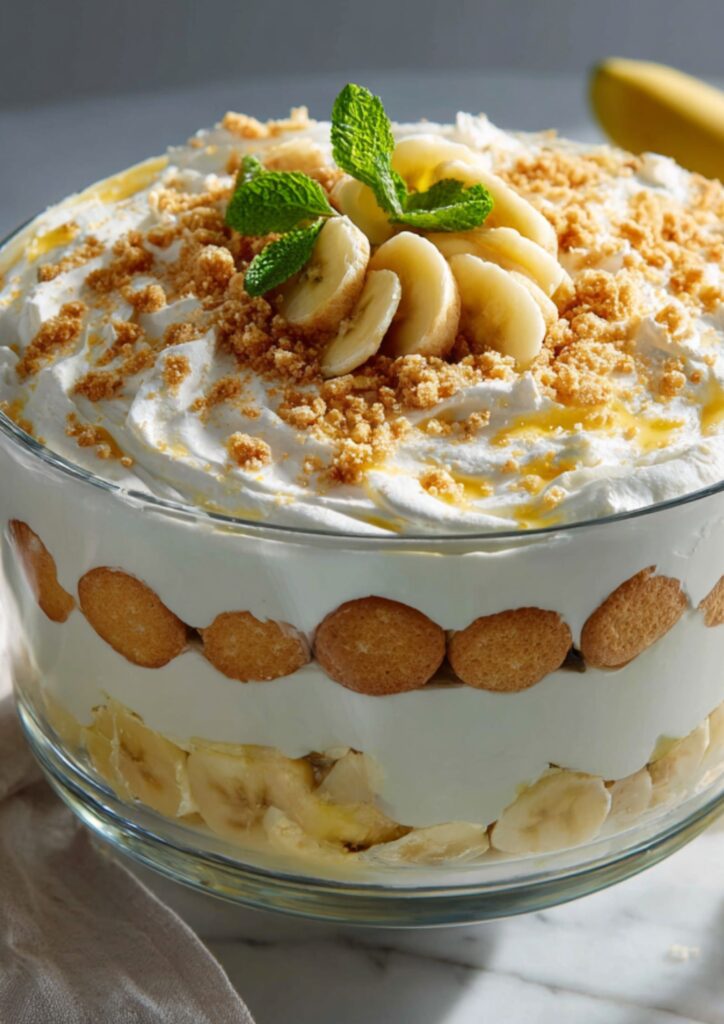
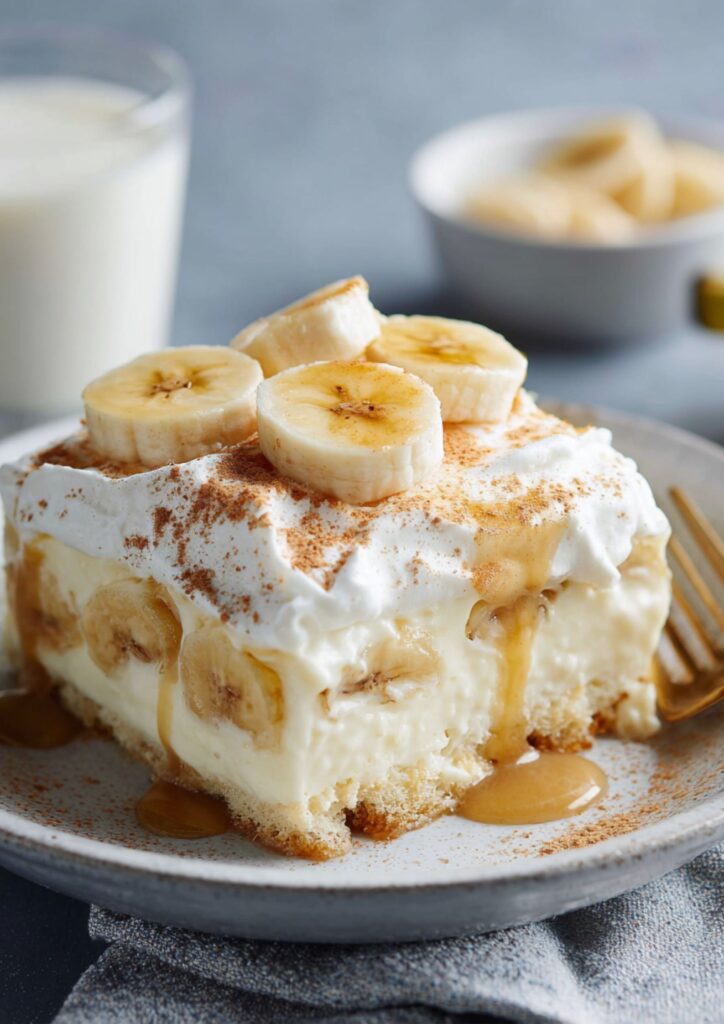
Joanna Gaines Banana Pudding is a classic American dessert that’s great for feeding a crowd. Creamy vanilla pudding gets layered with crunchy wafers and sliced bananas before being chilled until it’s light and fluffy.
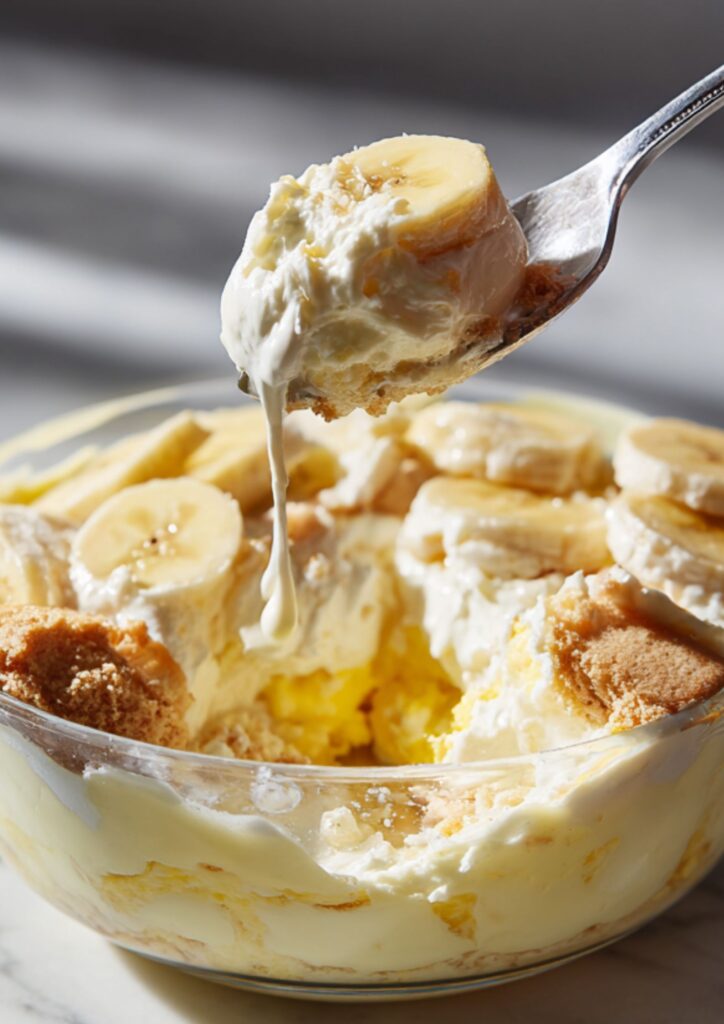
If you do nothing else, let this sit in the fridge for the full time. That’s the difference between a bowl of loose liquid and a sturdy dessert that actually holds its shape when you scoop it. I’ve found that rushing the chilling process means the cookies stay hard instead of getting that cake-like texture everyone loves.
The sweetened condensed milk is doing more work than you’d think here. Without it, the pudding is just a standard box mix, but adding it makes the whole thing feel much heavier and more like something from a professional bakery. I always use small bananas because they’re easier to slice into thin, even rounds that fit better between the wafer layers.
Joanna Gaines Banana Pudding Ingredients
For the Pudding Mixture:
- 2 cups (480ml) cold milk
- 1 package (5oz/142g) instant vanilla pudding mix
- 1 can (14oz/397g) sweetened condensed milk
- 1 tablespoon vanilla extract
- 1 container (12oz/340g) frozen whipped topping, thawed
For the Layers:
- 1 package (16oz/454g) vanilla wafers
- 14 small bananas, sliced thin

How To Make Joanna Gaines Banana Pudding
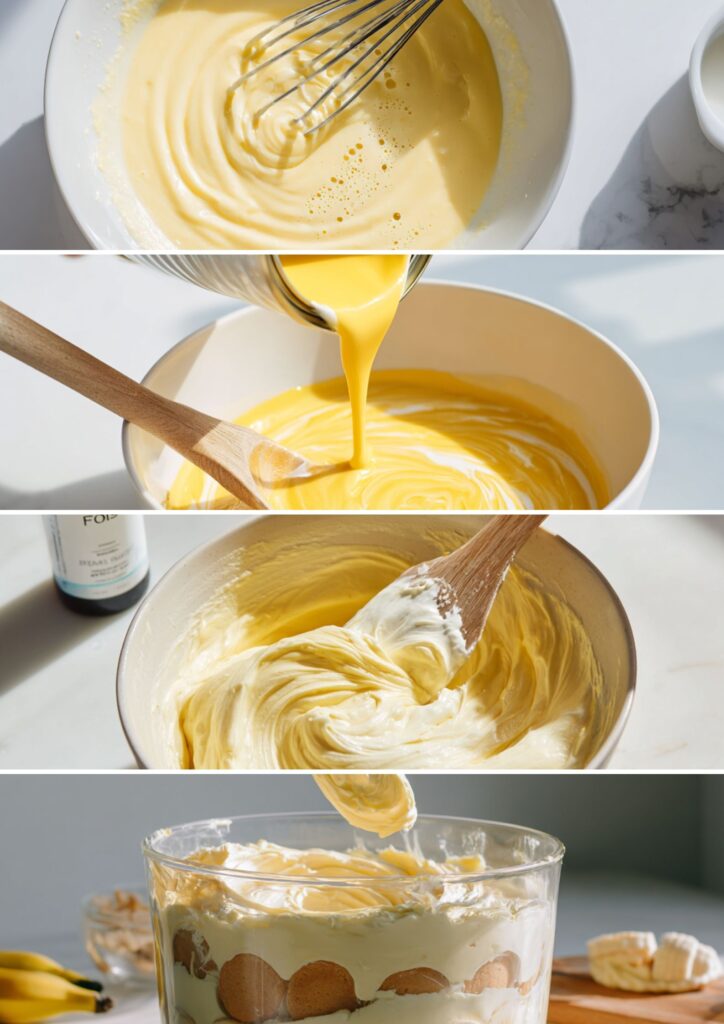
- 1. Make the base: Pour the cold milk into a large bowl and whisk in the instant pudding mix for about 2 minutes. Keep going until you feel the whisk start to drag and the liquid thickens up into a soft gel.
- 2. Add the milks: Pour the sweetened condensed milk into the thickened pudding and stir it until the yellow streaks disappear. Make sure you scrape the bottom of the bowl so the heavy syrup at the bottom gets mixed in properly.
- 3. Fold in the fluff: Stir in the vanilla extract, then use a wide spatula to gently mix in the thawed whipped topping. Use a slow lifting motion from the bottom to the top so you don’t knock the air out of the cream.
You want to keep as much volume as possible here. If you stir too fast or use a whisk, the topping will deflate and your final dessert will be runny instead of light and airy.
- 4. Start the layers: Line the bottom of a large glass bowl with a single layer of vanilla wafers, then cover them with a layer of sliced bananas. Pour about a third of the pudding mixture over the top and spread it out to the edges.
- 5. Repeat the pattern: Add another layer of cookies and fruit, followed by more pudding, until you’ve used everything up. Finish with a smooth layer of the pudding mixture on the very top to seal in the bananas.
- 6. Chill the bowl: Put the bowl in the fridge for at least 1 hour, though 3 or 4 hours is even better. This gives the cookies time to pull moisture from the cream so they soften up and become part of the dish.
- 7. Add the crunch: Just before you take the bowl to the table, crush a few extra wafers in your hands and scatter them over the top. Adding them at the last second ensures there’s still a bit of bite to contrast with the soft pudding.
Recipe Tips
- Choose the right bananas: Use fruit that’s yellow with just a few brown spots, as green bananas are too firm and very brown ones will turn to mush inside the layers. The slightly spotted ones have the best sugar content for this specific dish.
- Thaw the topping properly: Move the whipped topping from the freezer to the fridge the night before you plan to use it. If you try to use it while it’s still icy, it’ll create watery pockets in your pudding base as it melts later.
- Use a clear bowl: This dessert is all about the visible layers of cookies and fruit, so a glass trifle dish or a large glass salad bowl looks much better than a solid ceramic one. It helps you see if you’re spreading the pudding evenly to the edges.
- Dip your bananas: If you’re worried about the fruit turning brown, toss the slices in a little bit of lemon juice before layering. The acid keeps them looking bright even if you make the dish a day ahead of time.
- Keep it cold:Don’t leave this sitting out on a warm counter for more than 20 minutes. The whipped topping and milk will start to lose their structure and the whole thing will get messy.
- Save some cookies: I always set aside a handful of whole wafers from the box before I start layering. It’s much easier than trying to find unbroken ones at the end when you’re ready to decorate the top.
What To Serve With Joanna Gaines Banana Pudding
A cup of hot tea or a glass of ice-cold milk is all you really need with this. Since the pudding is very sweet and creamy, a drink that isn’t sugary helps balance the flavors.
If you want to add more to the table, a plate of salty pretzels or some dark chocolate shavings works well. The saltiness from the pretzels is a great way to cut through the heavy condensed milk.
Storing & Reheating Tips
- Fridge: Keep the bowl covered tightly with plastic wrap and store it in the fridge for up to 3 days. Make sure the wrap touches the surface of the pudding to keep a skin from forming on top.
- Freeze: I don’t recommend freezing this because the bananas will turn black and the pudding texture becomes grainy once it thaws. It’s much better to eat it fresh within a couple of days.
- Reheat: You should always eat this cold straight from the fridge. Do not try to warm it up in any way or the whipped topping will melt into a sugary liquid.
Joanna Gaines Banana Pudding Nutrition Facts
Per serving (1 of 12):
- Calories: 410 kcal
- Protein: 6g
- Fat: 14g
- Carbohydrates: 68g
- Sugar: 42g
- Sodium: 320mg
FAQs
Can I use homemade whipped cream instead of the tub for my Joanna Gaines Banana Pudding?
Yes, you can swap it out, but the pudding won’t be as stable and might start to weep liquid after a few hours. The tub version is specifically designed to hold its shape for days which is why it’s used here.
How do I stop the bananas from turning brown in Joanna Gaines Banana Pudding?
The best way is to make sure every single banana slice is fully covered by the pudding mixture so air can’t get to it. You can also give the slices a quick dunk in pineapple or lemon juice for extra protection.
Can I use cooked vanilla pudding instead of instant in my Joanna Gaines Banana Pudding?
No, the instant pudding is necessary because it sets differently and has a specific thickness that supports the weight of the bananas. Using the cooked kind will result in a much thinner dessert that won’t layer properly.
Is it okay to make Joanna Gaines Banana Pudding a day in advance?
Yes, this actually tastes better the next day because the wafers have more time to soften into a cake-like consistency. Just wait to add the crushed cookie topping until right before you serve it so those stay crunchy.
What can I use if I can’t find vanilla wafers?
Shortbread cookies or graham crackers are the best substitutes if you’re in a pinch. They have a similar snap and will soften up nicely once they’re buried in the vanilla cream for a few hours.
Check out More Recipes:

Joanna Gaines Banana Pudding
Description
Joanna Gaines Banana Pudding is a classic, crowd-pleasing Southern dessert that strikes a balance between airy texture and decadent sweetness. Built on a base of vanilla instant pudding and sweetened condensed milk, the filling is lightened with an entire container of whipped topping. Layered with crisp vanilla wafers and fresh banana slices, the dessert relies on a several-hour chill to transform the cookies into a soft, cake-like consistency. It’s a rustic, “trifle-style” masterpiece that is as visually appealing in a glass bowl as it is comforting to eat.
Ingredients
For the Pudding Mixture:
For the Layers:
Instructions
- Make the base: Pour the cold milk into a large bowl and whisk in the instant pudding mix for about 2 minutes. Keep going until you feel the whisk start to drag and the liquid thickens up into a soft gel.
- Add the milks: Pour the sweetened condensed milk into the thickened pudding and stir it until the yellow streaks disappear. Make sure you scrape the bottom of the bowl so the heavy syrup at the bottom gets mixed in properly.
- Fold in the fluff: Stir in the vanilla extract, then use a wide spatula to gently mix in the thawed whipped topping. Use a slow lifting motion from the bottom to the top so you don’t knock the air out of the cream.
- Start the layers: Line the bottom of a large glass bowl with a single layer of vanilla wafers, then cover them with a layer of sliced bananas. Pour about a third of the pudding mixture over the top and spread it out to the edges.
- Repeat the pattern: Add another layer of cookies and fruit, followed by more pudding, until you’ve used everything up. Finish with a smooth layer of the pudding mixture on the very top to seal in the bananas.
- Chill the bowl: Put the bowl in the fridge for at least 1 hour, though 3 or 4 hours is even better. This gives the cookies time to pull moisture from the cream so they soften up and become part of the dish.
- Add the crunch: Just before you take the bowl to the table, crush a few extra wafers in your hands and scatter them over the top. Adding them at the last second ensures there’s still a bit of bite to contrast with the soft pudding.
You want to keep as much volume as possible here. If you stir too fast or use a whisk, the topping will deflate and your final dessert will be runny instead of light and airy.
Notes
-
Choose the right bananas: Use fruit that’s yellow with just a few brown spots, as green bananas are too firm and very brown ones will turn to mush inside the layers. The slightly spotted ones have the best sugar content for this specific dish.
Thaw the topping properly: Move the whipped topping from the freezer to the fridge the night before you plan to use it. If you try to use it while it’s still icy, it’ll create watery pockets in your pudding base as it melts later.
Use a clear bowl: This dessert is all about the visible layers of cookies and fruit, so a glass trifle dish or a large glass salad bowl looks much better than a solid ceramic one. It helps you see if you’re spreading the pudding evenly to the edges.
Dip your bananas: If you’re worried about the fruit turning brown, toss the slices in a little bit of lemon juice before layering. The acid keeps them looking bright even if you make the dish a day ahead of time.
Keep it cold:Don’t leave this sitting out on a warm counter for more than 20 minutes. The whipped topping and milk will start to lose their structure and the whole thing will get messy.
Save some cookies: I always set aside a handful of whole wafers from the box before I start layering. It’s much easier than trying to find unbroken ones at the end when you’re ready to decorate the top.