Pioneer Woman red velvet cake balls are from-scratch red velvet cake crumbled and mixed with cream cheese frosting, rolled into balls, frozen, and dipped in white chocolate, ready in about 3 hours.
Ree has two recipes that combine into this one. Her Red Velvet Sheet Cake on Food Network, from the episode “Potluck Sunday,” gives you the from-scratch cake base. Her Cake Eyeballs recipe, also on Food Network and in her cookbook A Year of Holidays, provides the exact technique for turning any cake into dippable balls. Using both means you skip the box mix and get a richer result.
The balls must freeze for at least one hour before you dip them in chocolate. Ree flags this step specifically because room-temperature cake balls crumble apart the instant they hit warm melted chocolate. That hour firms the surface so each ball holds its shape while the coating sets.

Pioneer Woman Red Velvet Cake Balls Recipe
Description
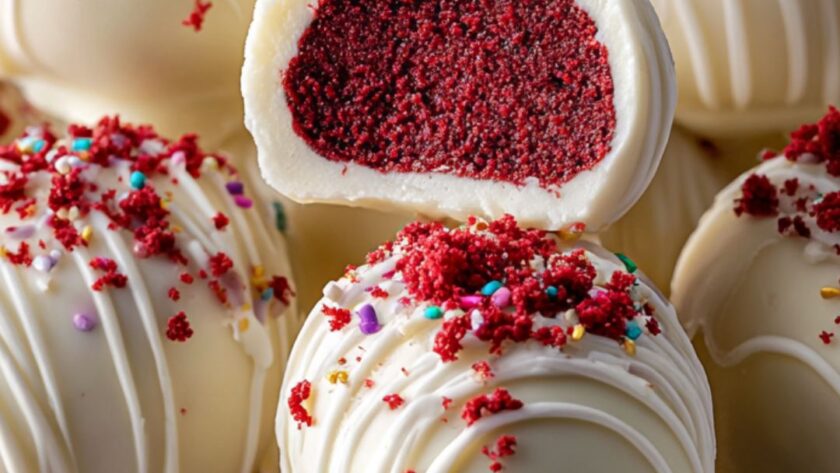
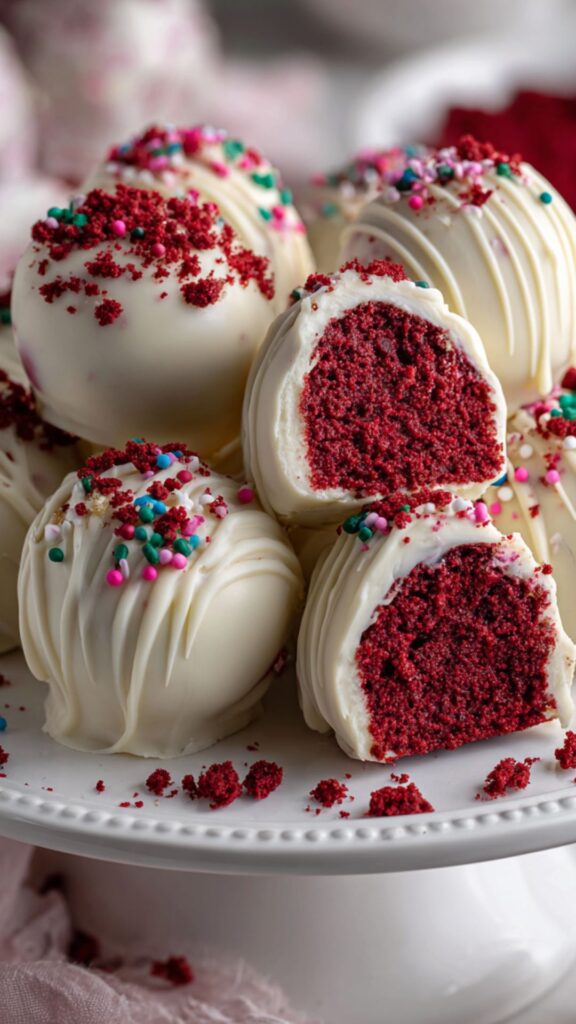
From-scratch red velvet cake bound with cream cheese frosting, shaped into bites, and sealed in a white chocolate shell. The deep red interior against the white coating makes every ball look impressive when you bite it in half.
Ingredients
For the cake (from Ree’s Red Velvet Sheet Cake):
For assembly (from Ree’s Cake Eyeballs technique):
Instructions
- Bake the cake. Preheat the oven to 350F (180C). Grease an 18×13-inch sheet pan. Whisk flour, cocoa, baking soda, and salt in a bowl. In a separate bowl, whisk oil, sugar, eggs, buttermilk, food coloring, vinegar, and vanilla until smooth. Fold the dry ingredients into the wet until just combined. Pour into the pan and bake until a toothpick comes out clean, about 20 minutes. Cool completely.
- Crumble the cake. Break the cooled cake into a large bowl and crumble into fine, even crumbs with no large chunks remaining.
- Add the frosting. Work the full can of cream cheese frosting into the crumbs with a rubber spatula until the frosting disappears completely and the mixture holds together when pressed.
- Roll the balls. Use a small ice cream scoop or tablespoon to portion the mixture, then roll each portion between your palms into a smooth 1 1/2-inch ball. Place on a parchment-lined baking sheet.
- Freeze. Place the tray in the freezer uncovered for at least 1 hour until the balls are firm all the way through.
- Dip in chocolate. Melt the white chocolate disks in a double boiler or microwave in 30-second bursts, stirring between each. Using a fork, lower one frozen ball into the chocolate, roll to coat, then lift and tap the fork against the bowl rim to let the excess drip off. Set back on the parchment. Add sprinkles before the chocolate sets. Repeat with all balls.
- Set and serve. Let the coated balls sit at room temperature for 10 to 15 minutes until the chocolate hardens completely. Store in the fridge in a single layer.
FAQs
Why use Ree’s from-scratch red velvet cake instead of a box mix?
Ree’s sheet cake recipe uses buttermilk and real cocoa powder, which give the crumbs a tangy depth that box mixes cannot match. That flavor matters more in a cake ball than in a regular slice because the frosting amplifies whatever the cake brings.
Box mix still works if you are short on time, and Ree lists it as an option in her Cake Eyeballs recipe. But the from-scratch version creates a denser, moister crumb that rolls into tighter balls and holds together better during dipping.
Why does Ree use a full can of frosting for the crumbs?
The frosting acts as the glue that binds the dry cake crumbs into a dough you can shape. Without enough frosting, the balls crack and fall apart when you roll them or dip them in chocolate.
A full 12-ounce can is the right ratio for one full sheet cake. If your cake is very moist already, you can hold back a few tablespoons. The test is simple: press a small amount in your palm and if it holds together without crumbling, you have enough.
Why white chocolate instead of dark chocolate for the coating?
White chocolate creates a visual contrast against the deep red cake inside. When guests bite a ball in half, the white shell and red interior look striking, which is part of what makes this dessert a crowd-pleaser.
Dark or milk chocolate work fine if you prefer the flavor, but the red cake will not show through the coating. If you go dark, consider drizzling white chocolate over the top so the finished balls still have some visual pop.
Can you make red velvet cake balls ahead of time?
Yes, and they actually improve with a day in the fridge because the frosting and cake flavors meld together. Store the finished balls in a single layer in an airtight container and refrigerate for up to five days.
You can also freeze the uncoated balls for up to a month. When ready to serve, dip them in chocolate straight from the freezer without thawing. The frozen center gives you more working time because the ball stays firm longer in the warm chocolate.
How do you keep the chocolate coating smooth and even?
Melt the chocolate slowly and stir constantly so it stays fluid. If the chocolate thickens while you work, add half a teaspoon of coconut oil and stir until smooth again. Thick chocolate creates lumpy coatings with drip marks.
Tap the fork firmly against the bowl rim three or four times after each dip so the excess runs off. Set the ball down gently and do not touch it once it is on the parchment. Any movement before the chocolate sets will leave fingerprint marks on the surface.