Pioneer Woman olive cheese balls are pimento-stuffed olives wrapped in cold cream cheese and rolled in chopped walnuts and fresh parsley, ready in about 10 minutes plus an hour of chilling time.
Ree’s recipe comes straight from her Olive Cheese Balls page on Food Network, made during The Pioneer Woman episode “A Very Brady Edition.” It is a four-ingredient, no-cook appetizer that can be prepped a full day before serving.
The cream cheese has to be cold when you wrap it around the olives. Warm cream cheese sticks to your hands, tears apart, and refuses to form a smooth ball. Cold slices mold around each olive in seconds and hold their shape through the walnut coating.

Pioneer Woman Olive Cheese Balls Recipe
Description
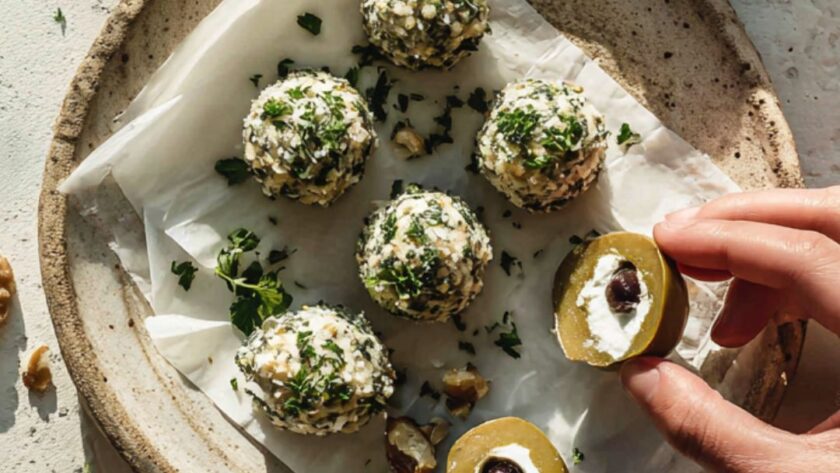
Salty pimento-stuffed olives hidden inside a smooth cream cheese shell, coated in crunchy walnuts and fresh parsley. Slice them in half before serving so guests can see the olive surprise inside.
Ingredients
Instructions
- Dry the olives. Lay the olives on a paper towel-lined plate and pat them gently so no moisture prevents the cream cheese from sticking.
- Wrap in cream cheese. Slice a piece of cold cream cheese about 1/4 inch thick, place one olive in the center, and press the cheese around it. Roll between your palms until smooth and fully sealed. Repeat with all 12 olives.
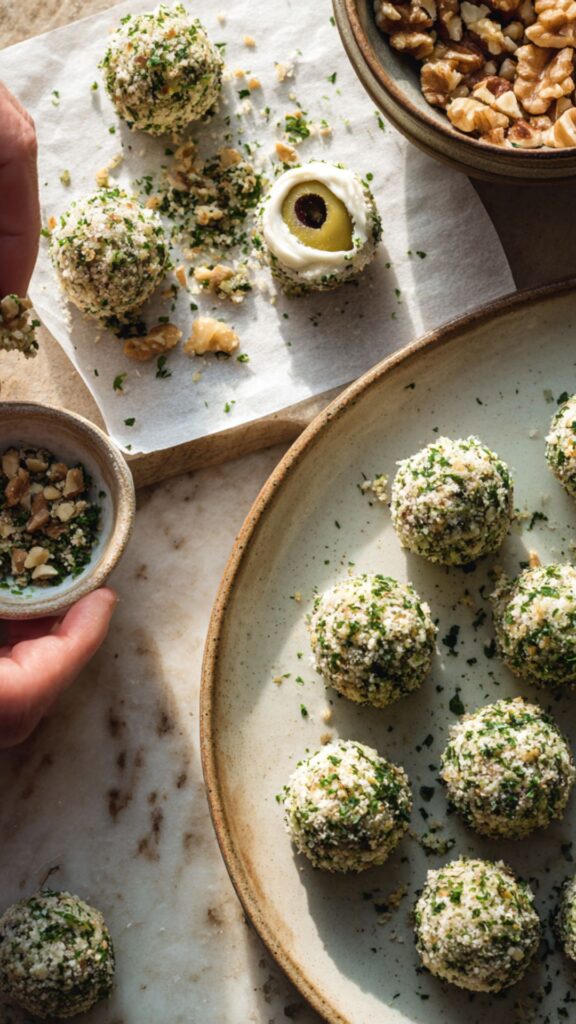
- Coat the balls. Mix the walnuts and parsley in a shallow dish. Roll each cream cheese ball through the mixture, pressing lightly so the coating sticks on all sides.
- Chill. Place the coated balls uncovered on a plate and refrigerate for at least 1 hour so the cream cheese firms up completely.
- Slice and serve. Cut each ball in half just before serving to show the olive center. This gives you 24 pieces total.
FAQs
Why does Ree slice the olive cheese balls in half before serving?
Cutting them open shows the pimento-stuffed olive hiding inside the cream cheese, which makes the plate look more interesting and gives guests a reason to pick one up. A whole ball just looks like a cheese ball, so the cross-section does the selling for you.
It also makes them easier to eat in one bite. A whole ball is a big mouthful, and biting into one can send the olive shooting out the other side.
Why do the olives need to be patted dry first?
Moisture on the surface of the olive creates a slippery layer between the olive and the cream cheese. If you skip drying, the cream cheese slides off while you roll it, or it separates in the fridge as the water works its way out.
A quick pat with a paper towel takes five seconds and keeps everything sealed tight. This matters most if your olives came from a jar with a lot of brine.
Can you use pecans instead of walnuts for the coating?
Pecans work well because they have a similar texture and a slightly sweeter, buttery flavor that pairs with the salty olive. Chop them fine so they press into the cream cheese the same way walnuts do.
Almonds are another option, though they are harder and crunchier. Avoid soft nuts like cashews because they do not create the same crunchy contrast against the smooth cream cheese.
How far ahead can you make olive cheese balls?
Ree notes these can be made a full day in advance, which makes them a strong party appetizer. Keep them uncovered in the fridge so the coating stays dry and crunchy instead of getting soft under plastic wrap.
Wait to slice them in half until right before serving. Once cut, the cream cheese surface dries out and the olive center loses its bright color within about 30 minutes.
Why does Ree use pimento-stuffed olives instead of plain green olives?
The pimento adds a sweet red pepper flavor that cuts through the rich cream cheese, and the red center creates a better visual when you slice the ball in half. Plain green olives taste sharper and more one-note without that contrast.
You could substitute blue cheese-stuffed or garlic-stuffed olives for a different flavor profile. Just avoid oil-packed olives because the excess oil makes it harder for the cream cheese to grip.