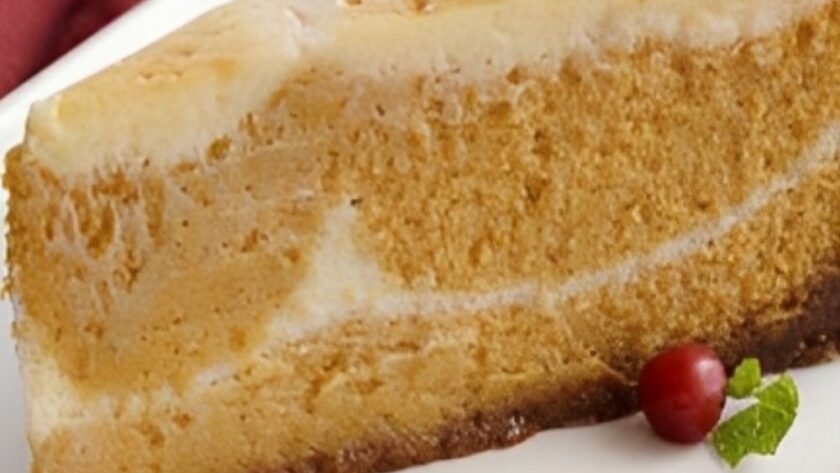
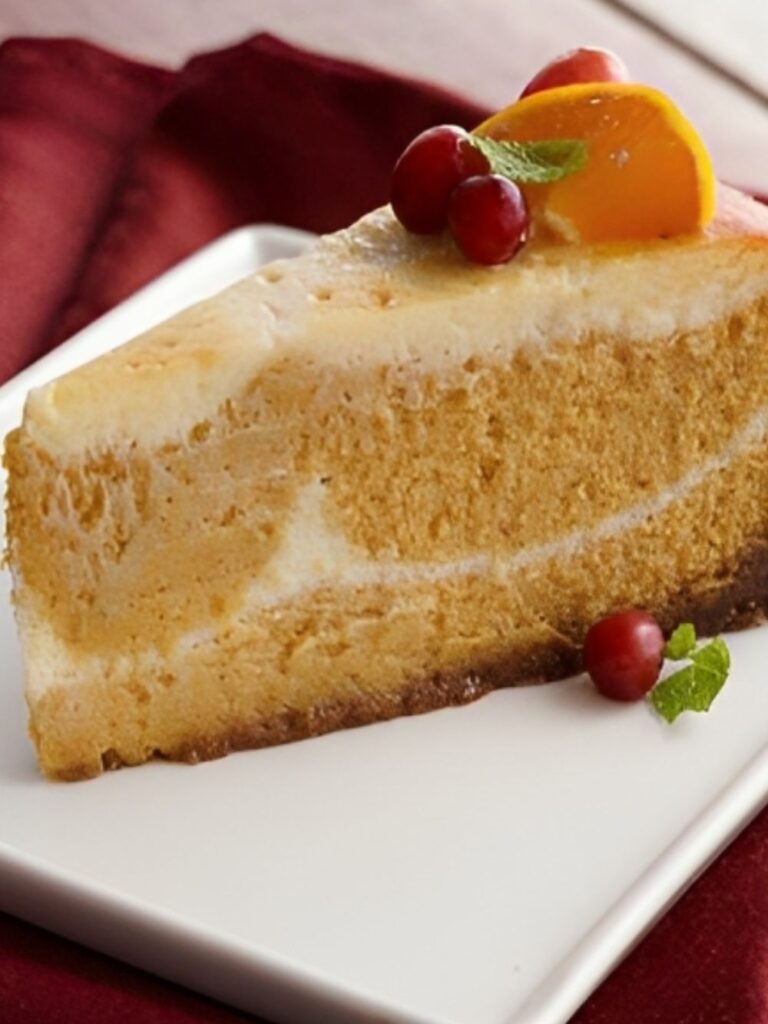
This Ina Garten Pumpkin Cheesecake is the best straightforward dessert featuring essential ingredients like cream cheese, pumpkin puree, and spices. It has a crust made from gingersnap cookies and walnuts and a filling that combines pumpkin and cream cheese flavors.
The cheesecake is baked in a 10-inch springform pan and consists of two layers: a pumpkin layer and a plain cream cheese layer. After baking and cooling, it’s ready to be enjoyed as a dessert or special occasion treat. It’s simple to prepare and doesn’t require extensive effort.
Ina Garten Pumpkin Cheesecake Ingredients
- 1-½ cups finely ground gingersnap cookies
- ¼ cup finely ground walnuts
- ¼ cup sugar
- 5 tablespoons butter, melted
- 3 packages (8 ounces each) of cream cheese, softened
- 1-¾ cups sugar
- 3 tablespoons all-purpose flour
- 6 eggs
- 1 teaspoon vanilla extract
- 1-½ teaspoons pumpkin pie spice
- 1 can (15 ounces) pumpkin
How To Make Ina Garten Pumpkin Cheesecake
- Preheat and Prepare Pan: Preheat your oven to 500°F. Mix gingersnaps, walnuts, sugar, and melted butter. Press this mixture into the bottom and 1 inch up the side of a 10-inch non-stick springform pan.
- Cream Cheese Mixture: In a bowl, beat cream cheese, sugar, and flour until smooth. Add 5 eggs, one at a time, and then add vanilla. Mix on low speed.
- Pumpkin Mixture: Transfer 2-½ cups of the cream cheese mixture to another bowl. To the remaining mixture, add 1 egg, pumpkin pie spice, and pumpkin. Mix until smooth.
- Layer and Swirl: Pour half of the pumpkin mixture into the crust, followed by half of the plain cream cheese mixture. Repeat and swirl gently with a spoon.
- Baking and Cooling: Bake at 500°F for 10 minutes, then reduce the temperature to 200°F and bake for 30 more minutes. Cover with foil and bake for an additional 1 hour. Let it cool in the oven for 20-30 minutes, then on a rack for 15 minutes. Chill in the fridge for at least 6 hours.
Tip: To prevent cracking, place a pan of water in the oven while baking.

What To Serve With Pumpkin Cheesecake
Serve your Pumpkin Cheesecake with a drizzle of salted caramel sauce for added sweetness and complexity. Homemade whipped cream or Peach Ice Cream also make excellent accompaniments. Fresh berries offer a lighter, refreshing option.
How To Store Pumpkin Cheesecake
In The Fridge:
To store the Pumpkin Cheesecake in the fridge, place it in an airtight container or wrap it tightly with plastic wrap. It will stay fresh for up to five days when stored on a flat surface in the refrigerator.
In The Freezer:
For longer storage, wrap the cheesecake tightly in plastic wrap and then in aluminum foil. Place the wrapped cheesecake in a freezer-safe zip-top bag and freeze it for up to one month. Thaw at room temperature or in the fridge before serving.
Check out More Recipes From Ina Garten:

Ina Garten Pumpkin Cheesecake
Description
This Ina Garten Pumpkin Cheesecake is the best straightforward dessert featuring essential ingredients like cream cheese, pumpkin puree, and spices. It has a crust made from gingersnap cookies and walnuts and a filling that combines pumpkin and cream cheese flavors.
Ina Garten Pumpkin Cheesecake Ingredients
How To Make Ina Garten Pumpkin Cheesecake
-
Preheat and Prepare Pan: Preheat your oven to 500°F. Mix gingersnaps, walnuts, sugar, and melted butter. Press this mixture into the bottom and 1 inch up the side of a 10-inch non-stick springform pan.
-
Cream Cheese Mixture: In a bowl, beat cream cheese, sugar, and flour until smooth. Add 5 eggs, one at a time, and then add vanilla. Mix on low speed.
-
Pumpkin Mixture: Transfer 2-½ cups of the cream cheese mixture to another bowl. To the remaining mixture, add 1 egg, pumpkin pie spice, and pumpkin. Mix until smooth.
-
Layer and Swirl: Pour half of the pumpkin mixture into the crust, followed by half of the plain cream cheese mixture. Repeat and swirl gently with a spoon.
- Baking and Cooling: Bake at 500°F for 10 minutes, then reduce the temperature to 200°F and bake for 30 more minutes. Cover with foil and bake for an additional 1 hour. Let it cool in the oven for 20-30 minutes, then on a rack for 15 minutes. Chill in the fridge for at least 6 hours.
Notes
- To prevent cracking, place a pan of water in the oven while baking.