This easy and versatile pie crust recipe by Joanna Gaines is perfect for any occasion! Made with simple, everyday ingredients, it comes together quickly for a buttery, flaky base that works beautifully for sweet or savory pies. Whether you’re making a classic fruit pie or a hearty quiche, this foolproof crust is a must-try!
Recipe Ingredients
- ½ cup vegetable shortening
- 1 ½ cups all-purpose flour
- ½ teaspoon salt
- ½ cup cold water
How To Make Pie Crust Recipe?
- Gather the ingredients : Make sure you have all the ingredients measured and ready to go.
- Mix the dough : Combine the shortening, flour, and salt in a mixing bowl. Use a fork or pastry blender to mix until the texture is crumbly. Slowly add cold water while mixing lightly with a fork, just until the dough holds together.
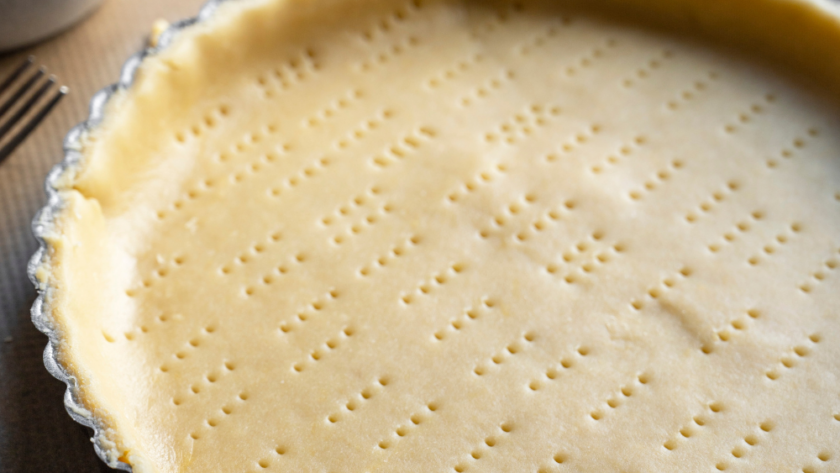
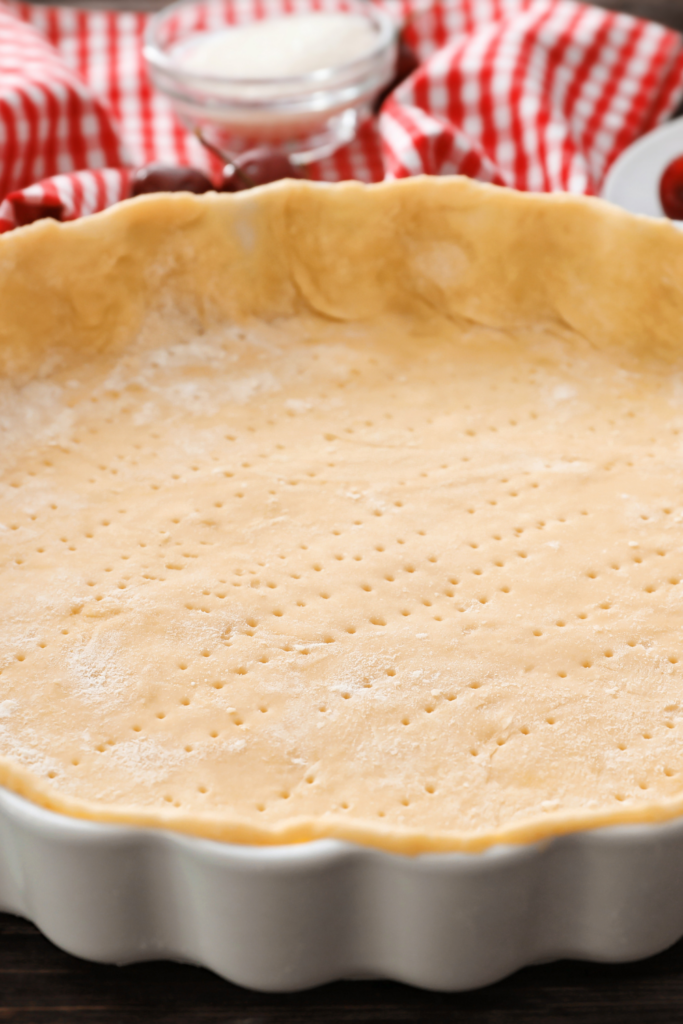
- Roll out the dough : Sprinkle a clean surface or pastry cloth with flour. Roll the dough gently into a circle about 2.5cm / 1 inch larger than your pie plate.
- Transfer to pie plate : Fold the rolled dough in half, carefully lift it onto the pie plate, and unfold it. Gently press it into the pan to fit.
- Trim and shape the edges : For a single-crust pie, trim the dough to leave a 1.25cm / ½ inch overhang. Fold the edges up and pinch them together to create a raised border.
Recipe Tips:
- Keep the shortening cold : Cold shortening is key to a flaky crust. If it softens, chill it in the fridge before mixing.
- Don’t overmix the dough : Mix just until the dough holds together. Overmixing can make the crust tough.
- Use cold water : Always use cold water to keep the dough firm and easy to roll out.
- Flour the surface lightly : Too much flour can make the crust dry. Use just enough to keep the dough from sticking.
- Chill the dough before baking : After shaping the crust, chill it in the fridge for 15–20 minutes. This helps prevent shrinking in the oven.
How To Store Leftovers?
- Refrigerate: Let the pie crust dough cool to room temperature if freshly made. Wrap it tightly in plastic wrap or store it in an airtight container. Refrigerate for up to 3 days.
- Freeze: After letting the dough cool, wrap it tightly in plastic wrap and place it in a freezer-safe bag or container. Freeze for up to 3 months. To use, thaw in the refrigerator overnight before rolling out and shaping.
Nutrition Facts
- Calories: 782
- Total Fat: 44g
- Saturated Fat: 14g
- Cholesterol: 0mg
- Sodium: 719mg
- Potassium: 176mg
- Total Carbohydrate: 87g
- Dietary Fiber: 0g
- Sugars: 0g
- Protein: 10g
Check out More Recipes:

Joanna Gaines Pie Crust Recipe
Description
This easy and versatile pie crust recipe by Joanna Gaines is perfect for any occasion! Made with simple, everyday ingredients, it comes together quickly for a buttery, flaky base that works beautifully for sweet or savory pies. Whether you’re making a classic fruit pie or a hearty quiche, this foolproof crust is a must-try!
Ingredients
Instructions
- Gather the ingredients : Make sure you have all the ingredients measured and ready to go.
- Mix the dough : Combine the shortening, flour, and salt in a mixing bowl. Use a fork or pastry blender to mix until the texture is crumbly. Slowly add cold water while mixing lightly with a fork, just until the dough holds together.
- Roll out the dough : Sprinkle a clean surface or pastry cloth with flour. Roll the dough gently into a circle about 2.5cm / 1 inch larger than your pie plate.
- Transfer to pie plate : Fold the rolled dough in half, carefully lift it onto the pie plate, and unfold it. Gently press it into the pan to fit.
- Trim and shape the edges : For a single-crust pie, trim the dough to leave a 1.25cm / ½ inch overhang. Fold the edges up and pinch them together to create a raised border.
Notes
- u003cliu003eu003cstrongu003eKeep the shortening coldu003c/strongu003e : Cold shortening is key to a flaky crust. If it softens, chill it in the fridge before mixing.u003c/liu003eu003cliu003eu003cstrongu003eDon’t overmix the doughu003c/strongu003e : Mix just until the dough holds together. Overmixing can make the crust tough.u003c/liu003eu003cliu003eu003cstrongu003eUse cold wateru003c/strongu003e : Always use cold water to keep the dough firm and easy to roll out.u003c/liu003eu003cliu003eu003cstrongu003eFlour the surface lightlyu003c/strongu003e : Too much flour can make the crust dry. Use just enough to keep the dough from sticking.u003c/liu003eu003cliu003eu003cstrongu003eChill the dough before bakingu003c/strongu003e : After shaping the crust, chill it in the fridge for 15–20 minutes. This helps prevent shrinking in the oven.u003c/liu003e
Nutrition Facts
Servings 4
- Amount Per Serving
- Calories 782kcal
- % Daily Value *
- Total Fat 44g68%
- Saturated Fat 14g70%
- Sodium 719mg30%
- Potassium 176mg6%
- Total Carbohydrate 87g29%
- Dietary Fiber 5.1g21%
- Sugars 6.5g
- Protein 10g20%
- Calcium 2.5 mg
- Iron 24 mg
* Percent Daily Values are based on a 2,000 calorie diet. Your daily value may be higher or lower depending on your calorie needs.