
Alton Brown Pizza Dough is a classic American bread base that creates a chewy, blistered crust for any home-baked pie. This recipe uses a long cold ferment and high-protein bread flour to develop the complex flavor and structure found in professional pizzerias.
The first time I made this, I tried to bake it right away, but now I always give it the full 24 hours in the fridge. That’s the difference between a dough that tastes like plain white bread and one with those deep, yeasty tangs and large air bubbles. If you skip the cold rise, the yeast doesn’t have time to break down the starches, and you’ll end up with a flat, heavy crust that lacks that signature crunch.
The bread flour is doing more work than you’d think to provide the stretch needed for hand-shaping. If you use all-purpose flour, the dough will tear the moment you try to pull it into a circle. I’ve found that using a pizza stone is the specific detail that mimics a professional oven by pulling moisture out of the bottom of the dough instantly. It’s a project that requires patience for the overnight wait, but the shatteringly crisp bottom makes the plan worthwhile.
Alton Brown Pizza Dough Recipe Ingredients
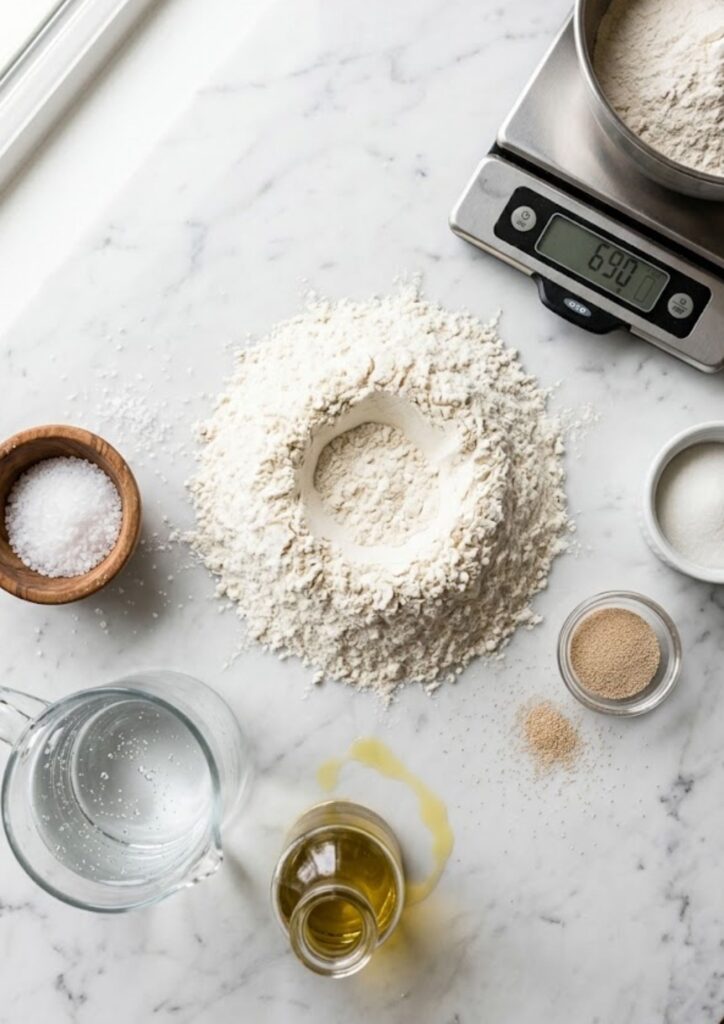
- 690g bread flour, plus extra for shaping
- 20g kosher salt
- 15g sugar
- 9g active dry yeast
- 455ml filtered water
- 15g olive oil, plus extra for brushing
How To Make Alton Brown Pizza Dough Recipe
- 1. Mix the dough: Put the bread flour, salt, sugar, and yeast into the bowl of a stand mixer. Pour the water and olive oil in together and mix on the lowest setting until a rough ball forms around the hook. Crank the speed up to medium and let the machine knead the dough for exactly 5 minutes until it looks smooth and elastic.
- 2. First rise: Dust your hands with flour and shape the dough into a tight ball on the counter. Put it into a bowl that’s been lightly coated with oil, wrap it tightly with plastic, and stick it in the fridge for 18 to 24 hours. This cold ferment is what allows the gluten to relax and the flavor to develop properly.
- 3. Divide the dough: Take the cold dough out and press the air out of it with your fist. Roll it into a long log on a floured surface and cut it into three equal pieces using a bench scraper or a sharp knife. Fold the edges of each piece into the center and roll them against the counter to create three tight, round balls.
- 4. Rest again: Place the dough balls under a clean kitchen towel and let them sit for 30 minutes. If you aren’t ready to bake yet, you can put them in individual containers in the fridge for another 8 hours, but you’ll need to let them sit on the counter for an hour before stretching.
- 5. Heat oven and stone: Slide your pizza stone onto the bottom rack of the oven and turn the heat up to 260°C (500°F) or as high as your oven will go. Let the stone sit in that heat for at least 30 minutes before you even think about putting a pizza on it.
- 6. Shape the dough: Dust a pizza peel with flour and flatten one dough ball into a thick disk. Use your knuckles to gently stretch the dough from the center outwards, leaving a slightly thicker lip around the very edge for the crust.
Do not use a rolling pin to flatten your pizza. A pin will crush all the tiny air bubbles you spent 24 hours creating, resulting in a crust that’s dense and hard rather than light and airy.
- 7. Top the pizza: Brush a thin layer of olive oil around the outer edge to help it brown. Add your sauce and cheese sparingly; too many toppings will make the center of the dough soggy and prevent it from crisping up on the stone.
- 8. Bake the pizza: Jiggle the peel to make sure the dough is sliding, then use a quick snap of the wrist to slide the pizza onto the hot stone. Bake for about 7 minutes until the cheese is bubbling and the crust has dark, charred spots.
- 9. Cool and serve: Slide the peel under the finished pizza to pull it out. Let it sit on a cutting board for 2 minutes so the cheese can set before you cut it into slices.

Recipe Tips
- Measure by weight only: Using cups for flour is too inconsistent for a dough that relies on a specific hydration level. A digital scale ensures you have the exact 690 grams needed for a dough that’s easy to stretch without being too sticky.
- Use filtered water: The chlorine in some tap water can slow down the yeast activity during the long cold rise. Using filtered water gives the yeast a cleaner environment to do its work over those 24 hours.
- Don’t over-sauce the middle: A common mistake is piling sauce in the center, which weighs down the dough and leads to a “soupy” slice. Keep the sauce thin enough that you can still see glimpses of the dough through it.
- Check the stone’s temp: Even if your oven says it’s preheated, the stone itself takes much longer to get truly hot. Giving it that extra 30 minutes ensures the bottom of the crust sears the second it touches the surface.
- Bring dough to room temp. Trying to stretch cold dough is a losing battle because the gluten stays tight. Let the balls sit out until they feel soft and pliable, which usually takes about 45 to 60 minutes depending on the heat in your kitchen.
- Oil your storage containers. If you’re doing the second rise in the fridge, grease the inside of the containers well. This allows the dough to slide out easily without you having to pull or tear the structure you’ve built.

What To Serve With Alton Brown Pizza Dough
A simple green salad with a sharp lemon vinaigrette helps cut through the heavy cheese and dough. You can also serve some hot honey or a side of ranch dressing for dipping the thick crusts.
If you have extra dough, you can bake it into plain flatbreads to serve with hummus or a warm spinach dip. A cold beer or a glass of fizzy sparkling water provides a refreshing finish to a heavy pizza dinner.

Storing & Reheating Tips
- Fridge: You can keep the raw dough balls in airtight containers for up to 3 days. The flavor will actually get even stronger on the second and third days, though the dough may become a bit harder to handle as it gets wetter.
- Freeze: Wrap individual raw dough balls in plastic and then put them in a freezer bag for up to 3 months. Thaw them in the fridge for a full day before you plan to use them so the yeast can wake back up slowly.
- Reheat: For leftover cooked pizza, the best way is to put the slices back on a hot skillet over medium heat for 2 minutes. This crisps the bottom back up while the cheese melts, which a microwave can’t do.
Alton Brown Pizza Dough Recipe Nutrition Facts
Per serving (1/12 of the total dough):
- Calories: 220 kcal
- Protein: 8g
- Fat: 2g
- Carbohydrates: 42g
- Sugar: 1g
- Sodium: 650mg
FAQs
Why is my Alton Brown Pizza Dough snapping back when I try to stretch it?
This means the gluten is too tight, which usually happens if the dough is too cold or hasn’t rested long enough after being balled. Let the dough sit undisturbed for another 15 minutes to relax the proteins.
Can I use all-purpose flour for this Alton Brown Pizza Dough?
You can, but the crust won’t have the same chewy strength. Bread flour has more protein, which is what creates the “chew” and allows you to stretch the dough paper-thin without it falling apart.
What if I don’t have a pizza stone?
You can flip a heavy baking sheet upside down and preheat it just like a stone. It won’t hold the heat quite as well as ceramic, but it’ll still give the bottom of the dough a much better sear than a cold pan.
Why didn’t my dough rise in the fridge?
Active dry yeast needs a little warmth to wake up initially. If your water was too cold or the yeast was old, it might not have started working before you put it in the cold fridge; always check that your yeast is fresh.
How do I get those big bubbles in the crust?
The bubbles are a result of the long cold ferment and the high heat of the oven. Avoid pressing on the outer edge of the dough while you’re shaping it so those pockets of air stay trapped in the rim.

Try More Recipes:

Alton Brown Pizza Dough Recipe
Description
Alton Brown Pizza Dough is a high-hydration, professionally engineered crust designed for a domestic oven. The recipe utilizes a 24-hour cold fermentation process, which allows the gluten to relax and the yeast to develop a complex, artisanal flavor profile. By avoiding rolling pins and using a high-heat pizza stone method, the dough produces a classic “leopard-spotted” charred crust that is crisp on the exterior while remaining light and airy inside.
Ingredients
Instructions
- Mix the dough: Put the bread flour, salt, sugar, and yeast into the bowl of a stand mixer. Pour the water and olive oil in together and mix on the lowest setting until a rough ball forms around the hook. Crank the speed up to medium and let the machine knead the dough for exactly 5 minutes until it looks smooth and elastic.
- First rise: Dust your hands with flour and shape the dough into a tight ball on the counter. Put it into a bowl that’s been lightly coated with oil, wrap it tightly with plastic, and stick it in the fridge for 18 to 24 hours. This cold ferment is what allows the gluten to relax and the flavor to develop properly.
- Divide the dough: Take the cold dough out and press the air out of it with your fist. Roll it into a long log on a floured surface and cut it into three equal pieces using a bench scraper or a sharp knife. Fold the edges of each piece into the center and roll them against the counter to create three tight, round balls.
- Rest again: Place the dough balls under a clean kitchen towel and let them sit for 30 minutes. If you aren’t ready to bake yet, you can put them in individual containers in the fridge for another 8 hours, but you’ll need to let them sit on the counter for an hour before stretching.
- Heat oven and stone: Slide your pizza stone onto the bottom rack of the oven and turn the heat up to 260°C (500°F) or as high as your oven will go. Let the stone sit in that heat for at least 30 minutes before you even think about putting a pizza on it.
- Shape the dough: Dust a pizza peel with flour and flatten one dough ball into a thick disk. Use your knuckles to gently stretch the dough from the center outwards, leaving a slightly thicker lip around the very edge for the crust.
- Top the pizza: Brush a thin layer of olive oil around the outer edge to help it brown. Add your sauce and cheese sparingly; too many toppings will make the center of the dough soggy and prevent it from crisping up on the stone.
- Bake the pizza: Jiggle the peel to make sure the dough is sliding, then use a quick snap of the wrist to slide the pizza onto the hot stone. Bake for about 7 minutes until the cheese is bubbling and the crust has dark, charred spots.
- Cool and serve: Slide the peel under the finished pizza to pull it out. Let it sit on a cutting board for 2 minutes so the cheese can set before you cut it into slices.
Do not use a rolling pin to flatten your pizza. A pin will crush all the tiny air bubbles you spent 24 hours creating, resulting in a crust that’s dense and hard rather than light and airy.
Notes
-
Measure by weight only: Using cups for flour is too inconsistent for a dough that relies on a specific hydration level. A digital scale ensures you have the exact 690 grams needed for a dough that’s easy to stretch without being too sticky.
Use filtered water: The chlorine in some tap water can slow down the yeast activity during the long cold rise. Using filtered water gives the yeast a cleaner environment to do its work over those 24 hours.
Don’t over-sauce the middle: A common mistake is piling sauce in the center, which weighs down the dough and leads to a “soupy” slice. Keep the sauce thin enough that you can still see glimpses of the dough through it.
Check the stone’s temp: Even if your oven says it’s preheated, the stone itself takes much longer to get truly hot. Giving it that extra 30 minutes ensures the bottom of the crust sears the second it touches the surface.
Bring dough to room temp. Trying to stretch cold dough is a losing battle because the gluten stays tight. Let the balls sit out until they feel soft and pliable, which usually takes about 45 to 60 minutes depending on the heat in your kitchen.
Oil your storage containers. If you’re doing the second rise in the fridge, grease the inside of the containers well. This allows the dough to slide out easily without you having to pull or tear the structure you’ve built.