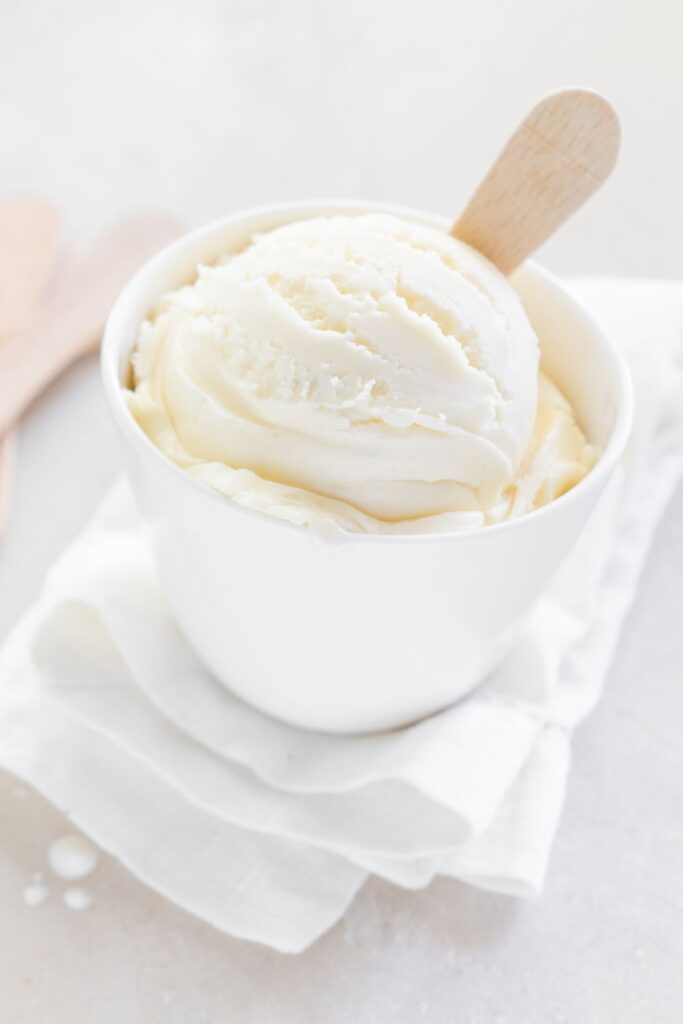
Alton Brown Ice Cream Recipe is a classic American dessert that uses a heavy custard base. This rich treat relies on tempering egg yolks with warm half-and-half and sugar to create a smooth, dense frozen texture.
I’ve tried a few versions of vanilla ice cream and this one from Alton Brown is the one I keep going back to because it doesn’t use heavy cream. Most recipes rely on that high fat content to hide mistakes, but this method uses the protein in egg yolks to get the same thick result. The first time I made this, I tried to rush the cooling process and ended up with a grainy mess. Now I always let the base sit in the fridge overnight to make sure the fat molecules stay stable during the churn.
If you do nothing else, keep the heat low while you’re thickening the custard. That’s the difference between a silky sauce and a pot full of sweet scrambled eggs. The vanilla extract is doing more work than you’d think here because it rounds out the sharpness of the dairy. Without it, you just have cold, sweet milk. I’ve found that using the best quality extract you can find makes a massive difference in the final bowl.
Alton Brown Ice Cream Recipe Ingredients
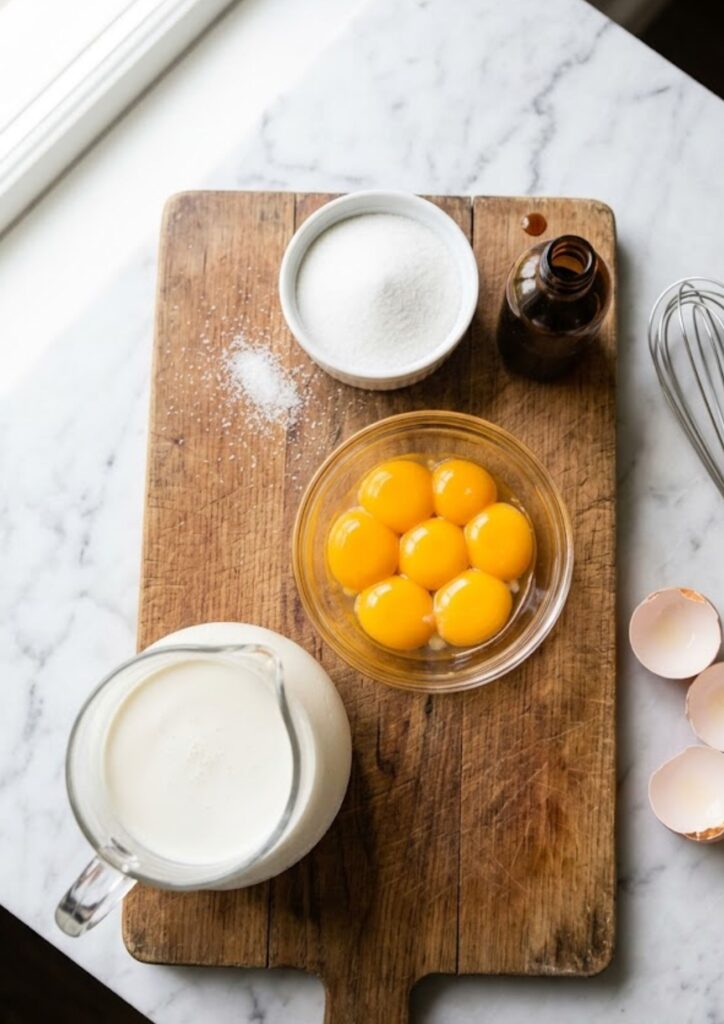
- 3 cups (710ml) half-and-half
- 8 large egg yolks
- 1 1/4 cups (250g) sugar
- 2 teaspoons (10ml) vanilla extract
How To Make Alton Brown Ice Cream Recipe
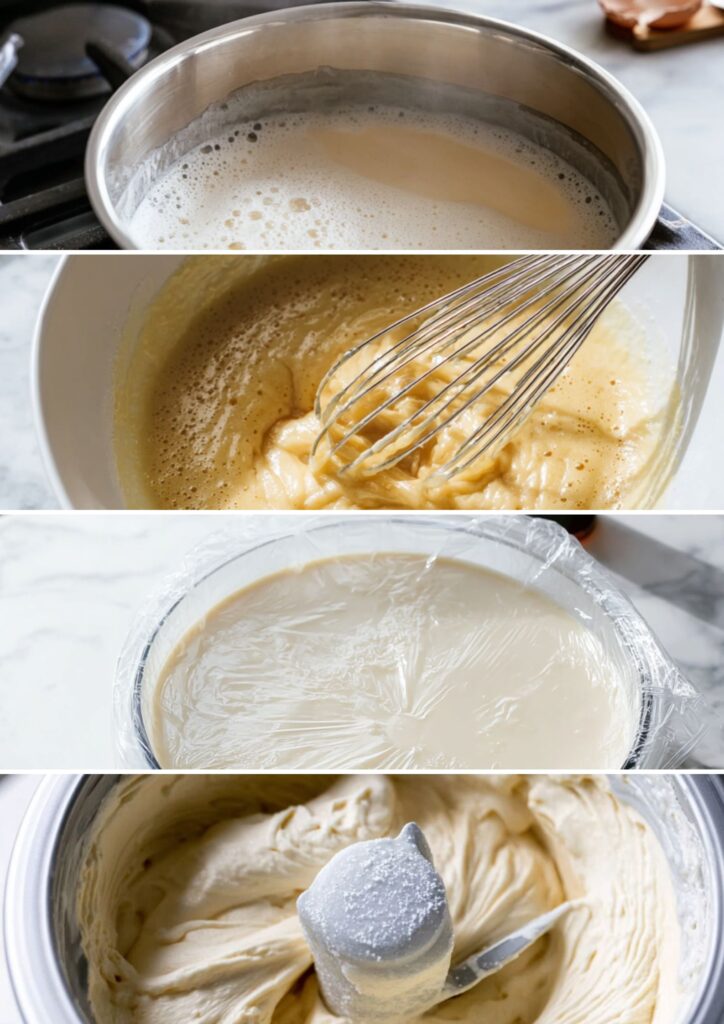
- 1. Heat the dairy: Pour the half-and-half into a medium saucepan and set it over medium heat. Stir it every minute or so until you see tiny bubbles forming around the edges and steam rising from the surface. Remove the pan from the heat immediately so the liquid doesn’t boil over or scorch the bottom.
- 2. Whisk egg yolks and sugar: Place the yolks in a large mixing bowl and beat them with a whisk until they turn a pale, dusty yellow. Add the sugar slowly while you keep whisking until the mixture looks smooth and slightly thickened. You want the sugar to start dissolving into the fats of the yolk before any heat hits them.
- 3. Temper the yolks: Use a ladle to slowly pour about one-third of the warm half-and-half into the bowl with the eggs while whisking fast with your other hand. This warms the eggs up slowly so they don’t cook and clump. If you pour the hot liquid in too fast without stirring, you’ll end up with solid yellow bits in your ice cream.
- 4. Cook the custard: Pour the egg and dairy mixture back into the saucepan and place it over low heat. Stir the bottom and sides constantly with a wooden spoon or spatula until the liquid thickens enough to coat the back of the spoon. Don’t let the temperature go above 175°F (80°C) or the eggs will curdle and ruin the texture.
- 5. Cool and refrigerate: Transfer the custard to a clean glass bowl and stir in the vanilla extract before letting it sit on the counter for 30 minutes. Once it isn’t steaming anymore, cover the surface with plastic wrap and chill it in the fridge for at least 4 hours. Making sure the mixture is below 40°F (4°C) is the only way to get small ice crystals during the churn.
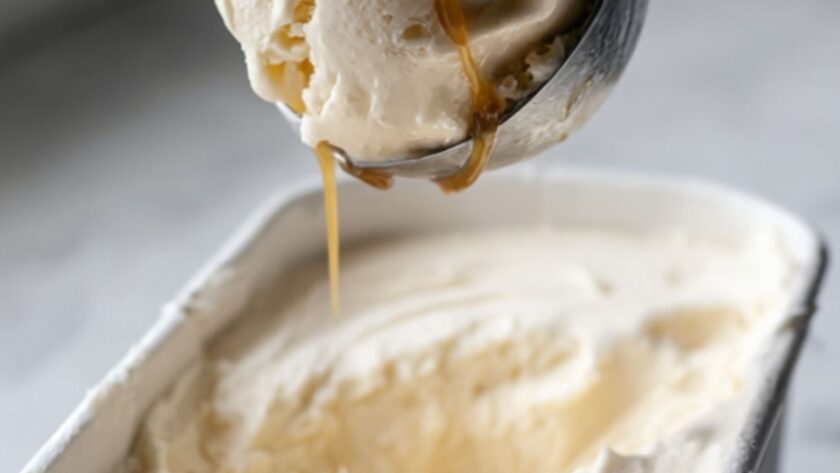
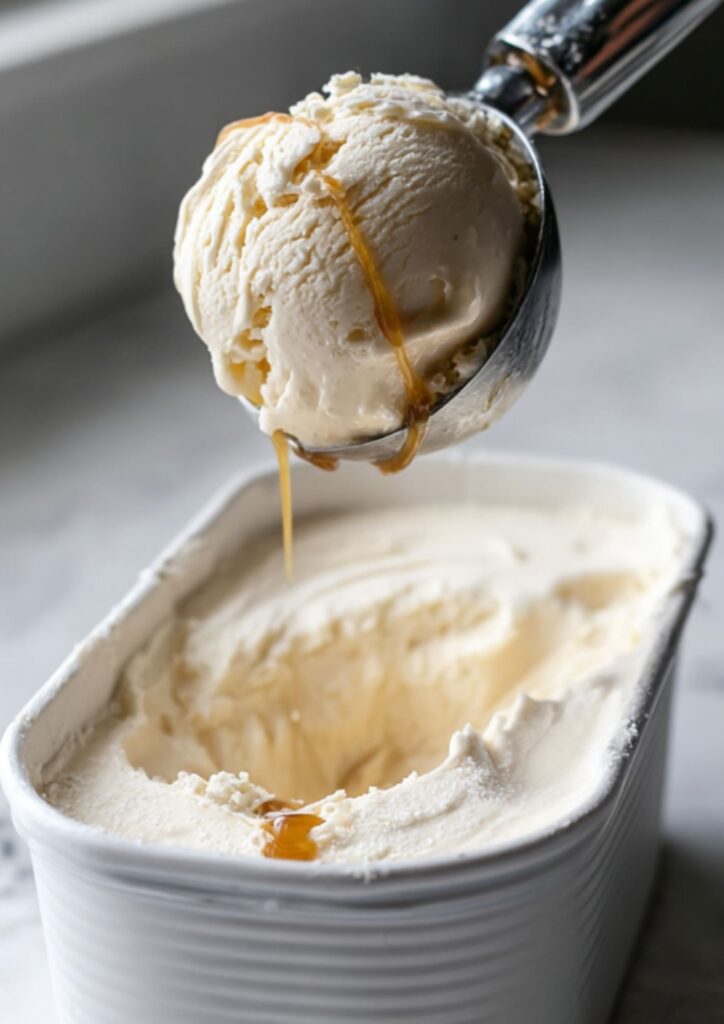
- 6. Churn and freeze: Pour the cold base into your ice cream machine and run it for 25 to 35 minutes depending on your model. The mixture should look like thick soft-serve when it’s done. You can eat it right away, but putting it in a container in the freezer for a few hours will give it that firm, scoopable consistency.
Recipe Tips
- Chill the machine bowl: Make sure your ice cream maker bowl has been in the freezer for at least 24 hours before you start. If the bowl isn’t frozen solid, the custard will just spin around without ever getting firm or airy.
- Use a thermometer: A digital probe is the best way to track the custard as it thickens on the stove. Pulling the pot off the heat at exactly 170°F (77°C) prevents the eggs from graining up while ensuring the base is thick enough to hold air.
- Press the plastic wrap: When you put the custard in the fridge, lay the plastic wrap directly on top of the liquid. This stops a tough skin from forming on the surface as it cools down, which would leave lumps in your finished scoop.
- Don’t skip the half-and-half: Using whole milk instead will make the ice cream icy and thin because there isn’t enough fat to coat the tongue. This specific ratio of fats and proteins is what creates the dense, professional feel of the recipe.
- Add mix-ins at the end: If you want to add chocolate chips or nuts, wait until the last two minutes of churning. Adding them too early can interfere with the freezing process or cause the heavy pieces to sink to the bottom of the machine.
- Store in the back: Put your finished container in the deepest part of your freezer rather than the door. Constant temperature changes from opening the door will cause the ice cream to melt and refreeze, making it feel gritty over time.
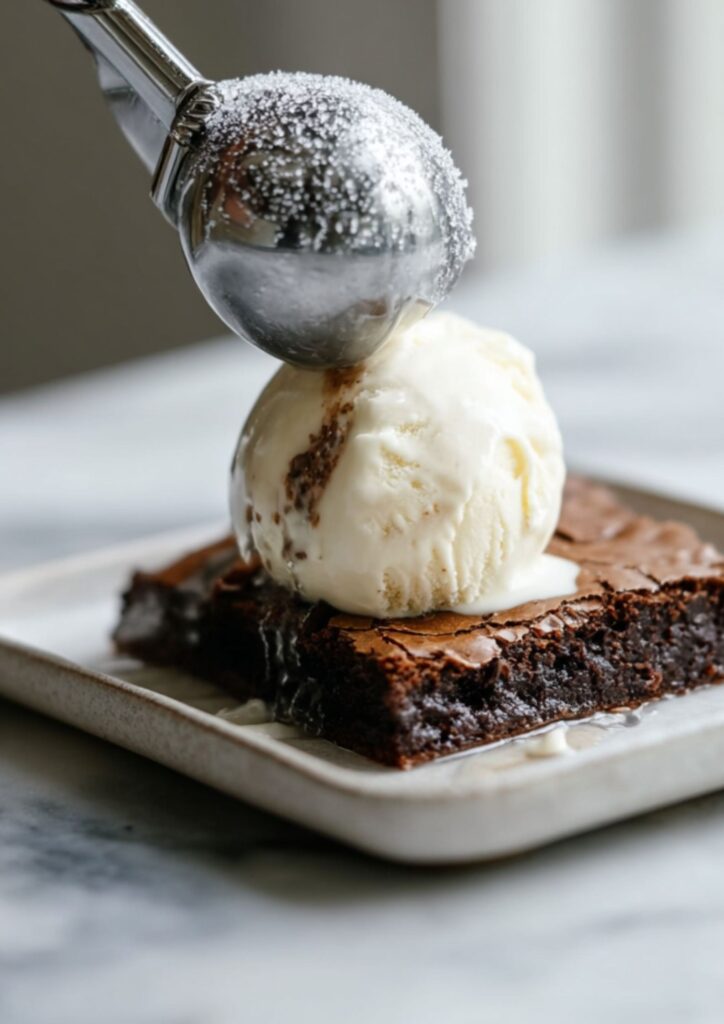
What To Serve With Alton Brown Ice Cream Recipe
Warm brownies or a fresh fruit crumble are the classic choices for a hot and cold pairing. The heat from the baked goods starts to melt the edges of the scoop, creating a natural sauce that coats everything.
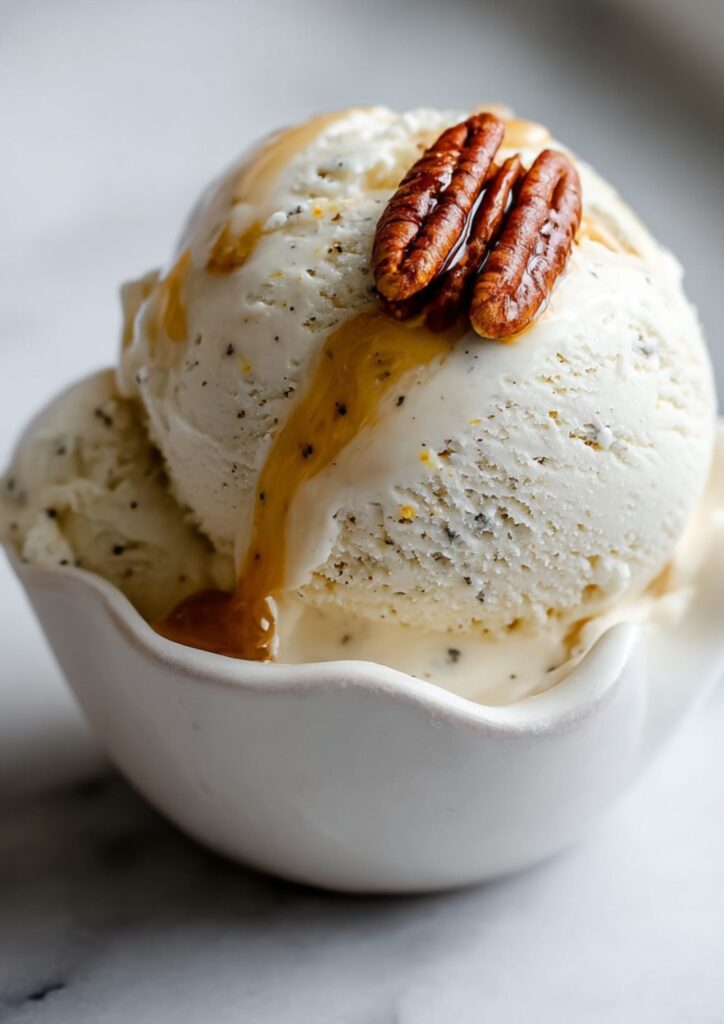
A simple drizzle of salted caramel or a handful of toasted pecans adds a nice crunch to the smooth texture. If you want something lighter, fresh raspberries or sliced peaches provide a sharp tang that cuts through the heavy dairy.
Stroing & Reheating Tricks
- Fridge: You should only keep the unfrozen custard base in the fridge. Place it in a sealed glass bowl for up to two days before churning.
- Freeze: Keep the churned ice cream in an airtight container with a layer of parchment paper pressed against the surface. It stays fresh and free of ice crystals for about two weeks if the seal is tight.
- Reheat: Do not try to melt and refreeze this dish as it will lose all its air and turn into a solid block of ice. If the ice cream is too hard to scoop, let the container sit on the counter for five minutes to soften naturally.
Alton Brown Ice Cream Recipe Nutrition Facts
Per serving (1 of 8):
- Calories: 280 kcal
- Protein: 6g
- Fat: 14g
- Carbohydrates: 34g
- Sugar: 32g
- Sodium: 45mg
FAQs
Can I use granulated sugar for this Alton Brown Ice Cream Recipe?
Yes, standard white granulated sugar is actually the best choice because it dissolves quickly into the yolks. Avoid using brown sugar unless you want a deep molasses flavor that might overpower the vanilla.
Why did my ice cream turn out icy instead of smooth?
This usually happens if the custard base wasn’t cold enough before you put it into the machine. If the base starts out warm, it takes longer to freeze, which allows large ice crystals to grow and ruin the texture.
Can I use milk instead of half-and-half?
No, using only milk will result in a thin and watery dessert that feels more like an ice pop than a custard. The fat in the half-and-half is necessary to create the creamy mouthfeel this specific recipe is known for.
How do I know when the custard is thick enough?
You can test this by dipping a spoon into the pot and drawing a line through the coating on the back with your finger. If the path stays clear and the liquid doesn’t run back into the gap, it’s ready to be cooled.
Can I make this Alton Brown Ice Cream without an ice cream machine?
You can pour the mixture into a shallow pan and stir it vigorously every thirty minutes while it freezes. It won’t be as light or airy as the machine-churned version, but it will still taste great.
Try More Recipes:

Alton Brown Ice Cream Recipe
Description
Alton Brown Ice Cream is a scientifically balanced vanilla custard base designed for maximum density and a professional, “no-ice” finish. Utilizing the tempering method to incorporate egg yolks into half-and-half, the recipe creates a rich emulsion that captures air efficiently during the churning process. This high-fat, high-protein ratio ensures a velvety mouthfeel and a stable structure that remains creamy even after long-term freezing, provided the custard is chilled below 4°C (40°F) before churning.
Ingredients
Instructions
- Heat the dairy: Pour the half-and-half into a medium saucepan and set it over medium heat. Stir it every minute or so until you see tiny bubbles forming around the edges and steam rising from the surface. Remove the pan from the heat immediately so the liquid doesn’t boil over or scorch the bottom.
- Whisk egg yolks and sugar: Place the yolks in a large mixing bowl and beat them with a whisk until they turn a pale, dusty yellow. Add the sugar slowly while you keep whisking until the mixture looks smooth and slightly thickened. You want the sugar to start dissolving into the fats of the yolk before any heat hits them.
- Temper the yolks: Use a ladle to slowly pour about one-third of the warm half-and-half into the bowl with the eggs while whisking fast with your other hand. This warms the eggs up slowly so they don’t cook and clump. If you pour the hot liquid in too fast without stirring, you’ll end up with solid yellow bits in your ice cream.
- Cook the custard: Pour the egg and dairy mixture back into the saucepan and place it over low heat. Stir the bottom and sides constantly with a wooden spoon or spatula until the liquid thickens enough to coat the back of the spoon. Don’t let the temperature go above 175°F (80°C) or the eggs will curdle and ruin the texture.
- Cool and refrigerate: Transfer the custard to a clean glass bowl and stir in the vanilla extract before letting it sit on the counter for 30 minutes. Once it isn’t steaming anymore, cover the surface with plastic wrap and chill it in the fridge for at least 4 hours. Making sure the mixture is below 40°F (4°C) is the only way to get small ice crystals during the churn.
- Churn and freeze: Pour the cold base into your ice cream machine and run it for 25 to 35 minutes depending on your model. The mixture should look like thick soft-serve when it’s done. You can eat it right away, but putting it in a container in the freezer for a few hours will give it that firm, scoopable consistency.
Notes
-
Chill the machine bowl: Make sure your ice cream maker bowl has been in the freezer for at least 24 hours before you start. If the bowl isn’t frozen solid, the custard will just spin around without ever getting firm or airy.
Use a thermometer: A digital probe is the best way to track the custard as it thickens on the stove. Pulling the pot off the heat at exactly 170°F (77°C) prevents the eggs from graining up while ensuring the base is thick enough to hold air.
Press the plastic wrap: When you put the custard in the fridge, lay the plastic wrap directly on top of the liquid. This stops a tough skin from forming on the surface as it cools down, which would leave lumps in your finished scoop.
Don’t skip the half-and-half: Using whole milk instead will make the ice cream icy and thin because there isn’t enough fat to coat the tongue. This specific ratio of fats and proteins is what creates the dense, professional feel of the recipe.
Add mix-ins at the end: If you want to add chocolate chips or nuts, wait until the last two minutes of churning. Adding them too early can interfere with the freezing process or cause the heavy pieces to sink to the bottom of the machine.
Store in the back: Put your finished container in the deepest part of your freezer rather than the door. Constant temperature changes from opening the door will cause the ice cream to melt and refreeze, making it feel gritty over time.