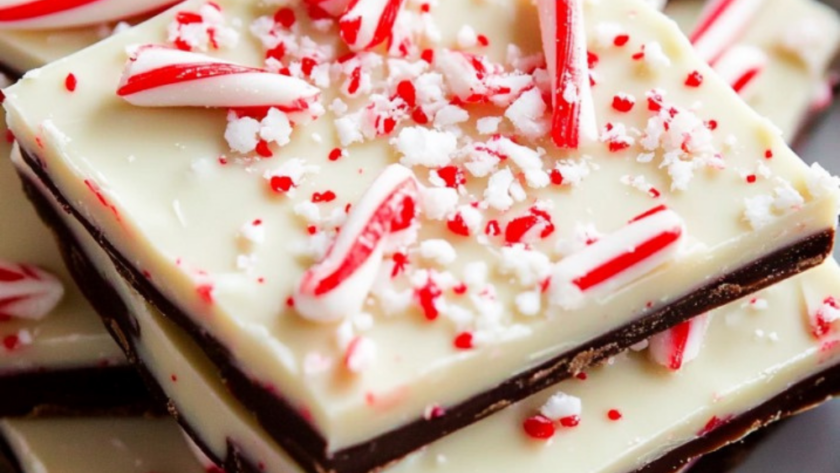
This easy and delicious Peppermint Bark by Joanna Gaines is a festive treat perfect for the holiday season! With creamy white chocolate, rich semi-sweet layers, and a crunchy candy cane topping, it’s quick to make and uses simple, everyday ingredients. Great for gifting or indulging, this bark adds a touch of sweetness to your celebrations!
Recipe Ingredients:
- 12 ounces white chocolate, coarsely chopped and divided*
- 6 ounces semi-sweet or bittersweet chocolate, coarsely chopped*
- 1 and 1/2 teaspoons vegetable oil or coconut oil, divided
- 1/2 teaspoon peppermint extract, divided
- 2–3 regular-size candy canes , crushed
How To Make Peppermint Bark?
- Prepare the pan: Line an 8-inch (20cm) or 9-inch (23cm) square baking pan (or a baking sheet) with parchment paper or foil, smoothing out wrinkles. Set aside.
- Make the bottom layer: Melt 170g / 6 oz white chocolate with ½ tsp / 2.5ml oil in the microwave in 20-second increments, stirring well after each interval. Once smooth, stir in ¼ tsp / 1.25ml peppermint extract. Spread the melted chocolate evenly into the pan. Chill in the fridge for 10–15 minutes until almost set.
- Make the middle layer: Melt 170g / 6 oz semi-sweet chocolate with ½ tsp / 2.5ml oil in the same way. Stir in the remaining ¼ tsp / 1.25ml peppermint extract. Spread evenly over the white chocolate layer and refrigerate for another 10–15 minutes until nearly set.
- Make the top layer: Melt the remaining 170g / 6 oz white chocolate with the last ½ tsp / 2.5ml oil. Spread it evenly over the semi-sweet chocolate layer. Sprinkle with crushed candy canes, ensuring an even distribution.
- Set and slice: Refrigerate for 1 hour until fully set. Remove from the pan, peel off parchment/foil, and break or cut into desired pieces. If refrigerated for more than 3–4 hours, let it soften at room temperature for 10–15 minutes before breaking to avoid layer separation.

Recipe Tips:
- Use high-quality chocolate: For the best flavor and texture, use good-quality chocolate bars instead of chocolate chips, as chips may not melt as smoothly.
- Melt chocolate slowly: Always melt the chocolate in 20-second increments or over low heat to avoid overheating, which can cause the chocolate to seize and ruin the recipe.
- Don’t let layers fully harden: Ensure each layer is almost set but still slightly tacky before adding the next. This helps the layers stick together and prevents them from separating later.
- Spread layers evenly: Use a spatula or the back of a spoon to spread each layer evenly and thinly for a professional-looking bark that breaks nicely.
- Crush candy canes carefully: Place candy canes in a sealed bag and crush them gently with a rolling pin to avoid making powdery crumbs—larger pieces look better and add more crunch.
How To Store Leftovers?
First, let the leftover Peppermint Bark cool to room temperature. Then, place it in an airtight container and store it in the refrigerator for up to 3 weeks to keep it fresh and firm.
Nutrition Facts
- Calories: 144
- Total Fat: 8.4g
- Saturated Fat: 5g
- Cholesterol: 3.2mg
- Sodium: 16mg
- Potassium: 86.2mg
- Total Carbohydrate: 18g
- Dietary Fiber: 0.7g
- Sugars: 16g
- Protein: 1.4g
Check out More Recipes:

Joanna Gaines Peppermint Bark
Description
This easy and delicious Peppermint Bark by Joanna Gaines is a festive treat perfect for the holiday season! With creamy white chocolate, rich semi-sweet layers, and a crunchy candy cane topping, it’s quick to make and uses simple, everyday ingredients. Great for gifting or indulging, this bark adds a touch of sweetness to your celebrations!
Ingredients
Instructions
- Prepare the pan: Line an 8-inch (20cm) or 9-inch (23cm) square baking pan (or a baking sheet) with parchment paper or foil, smoothing out wrinkles. Set aside.
- Make the bottom layer: Melt 170g / 6 oz white chocolate with ½ tsp / 2.5ml oil in the microwave in 20-second increments, stirring well after each interval. Once smooth, stir in ¼ tsp / 1.25ml peppermint extract. Spread the melted chocolate evenly into the pan. Chill in the fridge for 10–15 minutes until almost set.
- Make the middle layer: Melt 170g / 6 oz semi-sweet chocolate with ½ tsp / 2.5ml oil in the same way. Stir in the remaining ¼ tsp / 1.25ml peppermint extract. Spread evenly over the white chocolate layer and refrigerate for another 10–15 minutes until nearly set.
- Make the top layer: Melt the remaining 170g / 6 oz white chocolate with the last ½ tsp / 2.5ml oil. Spread it evenly over the semi-sweet chocolate layer. Sprinkle with crushed candy canes, ensuring an even distribution.
- Set and slice: Refrigerate for 1 hour until fully set. Remove from the pan, peel off parchment/foil, and break or cut into desired pieces. If refrigerated for more than 3–4 hours, let it soften at room temperature for 10–15 minutes before breaking to avoid layer separation.
Notes
- Use high-quality chocolate: For the best flavor and texture, use good-quality chocolate bars instead of chocolate chips, as chips may not melt as smoothly.
- Melt chocolate slowly: Always melt the chocolate in 20-second increments or over low heat to avoid overheating, which can cause the chocolate to seize and ruin the recipe.
- Don’t let layers fully harden: Ensure each layer is almost set but still slightly tacky before adding the next. This helps the layers stick together and prevents them from separating later.
- Spread layers evenly: Use a spatula or the back of a spoon to spread each layer evenly and thinly for a professional-looking bark that breaks nicely.
- Crush candy canes carefully: Place candy canes in a sealed bag and crush them gently with a rolling pin to avoid making powdery crumbs—larger pieces look better and add more crunch.

